
Twenty-four chords explained with only three finger settings
This page contains affiliate links. We may earn money or products from the companies mentioned in this post through our independently chosen links, which earn us a commission. Learn More
This blog is written by Chordify, the place made for and by music enthusiasts, where you can find the chords to any song.
Let us break it down for you: there are twelve major and twelve minor chords you can play in standard tuning on your guitar. That’s a lot! But what if you could play all of them using only three basic finger settings? Sounds pretty awesome, right? Check it out.
Let’s start off with the disclaimer: this blog post requires a basic understanding of chord buildup and some familiarity with the guitar neck, otherwise it might be somewhat difficult. But if you have that knowledge or are up for a challenge, it’s definitely going to be worth your while. Prepare for your mind to be blown.
The twenty-four-chords hack
We lured you in stating that we could teach you the secret of playing twenty-four chords with only three simple finger settings. True as it may be, this trick is a lot easier when you understand the theory behind not three, but four basic chords.
We’re talking about the E, Em, A, and Am. In these chords lies the secret that will unlock the guitar neck. Why? Well, let’s take a closer look shall we.
Unlocking the guitar neck using the E
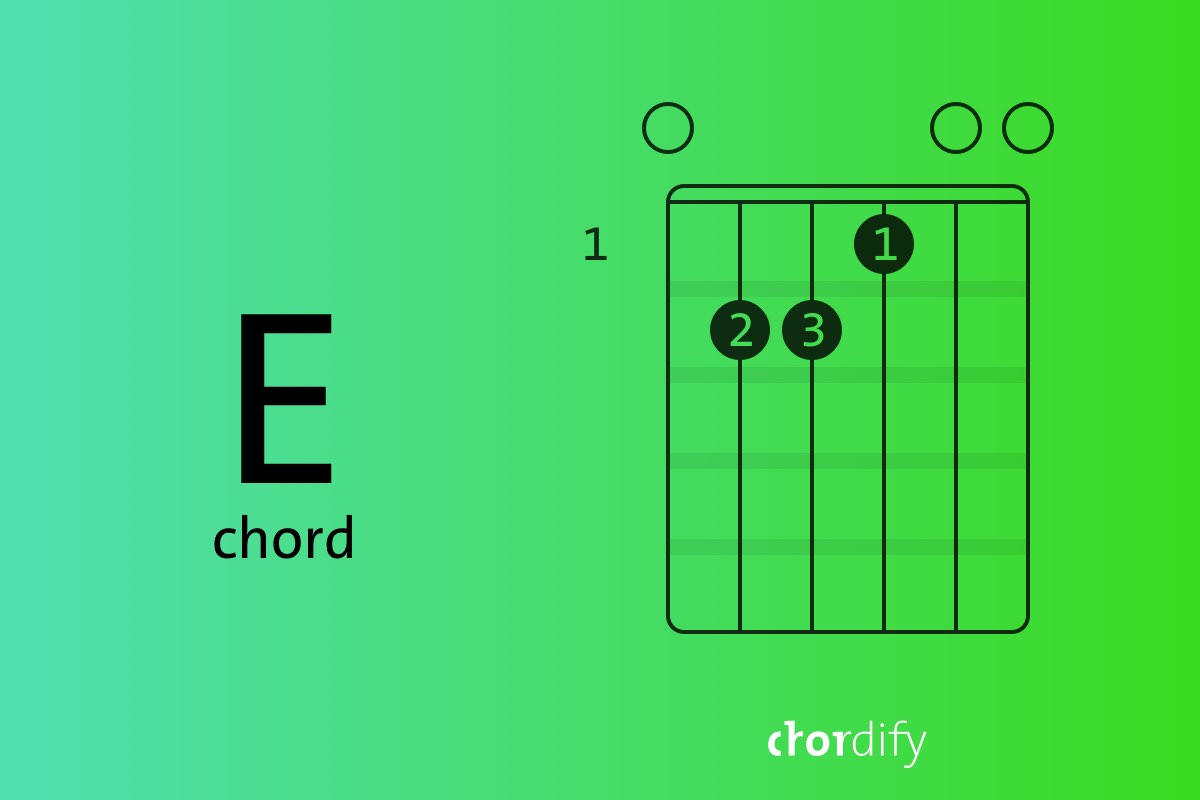
We’re starting off with the E. It’s fair to say that this is probably the first chord you learned when you picked up that guitar. If you forgot what an E chord looks like check out the chord diagram below. Now position your fingers and give the strings a good ring. Sounds like it always does, doesn’t it? Okay, time to put your nose to the grindstone.
Move the fingering of the E chord up one fret on the fretboard and strike it again. Well this sounds interesting. You’re practically playing an F major, but to complete this chord you’ll have to place your index finger flat on the first fret and press real hard while your other fingers maintain their initial position. But how do you know this is an F major? Well you can use the lower E string as a reference for the root notes of the chords. Pressing the lower E string on the first fret gives you an F.
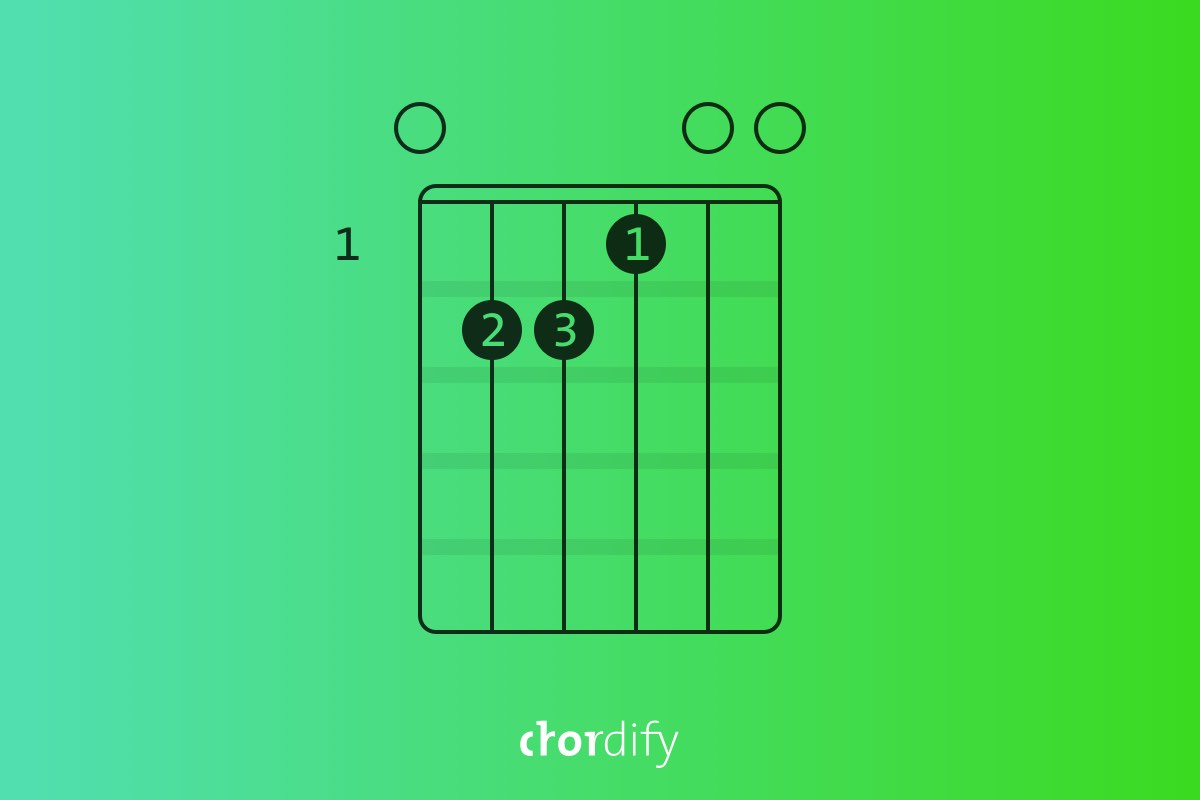
And what about the Em?
“Yeah, what about the Em?!” You’re getting psyched by this new knowledge, we can feel it. You’re slowly starting to get the logic of the guitar neck. Let’s turn it up a notch and take a look at the Em chord. What if you just repeat all the steps you just did with the E chord, only now by playing an Em.
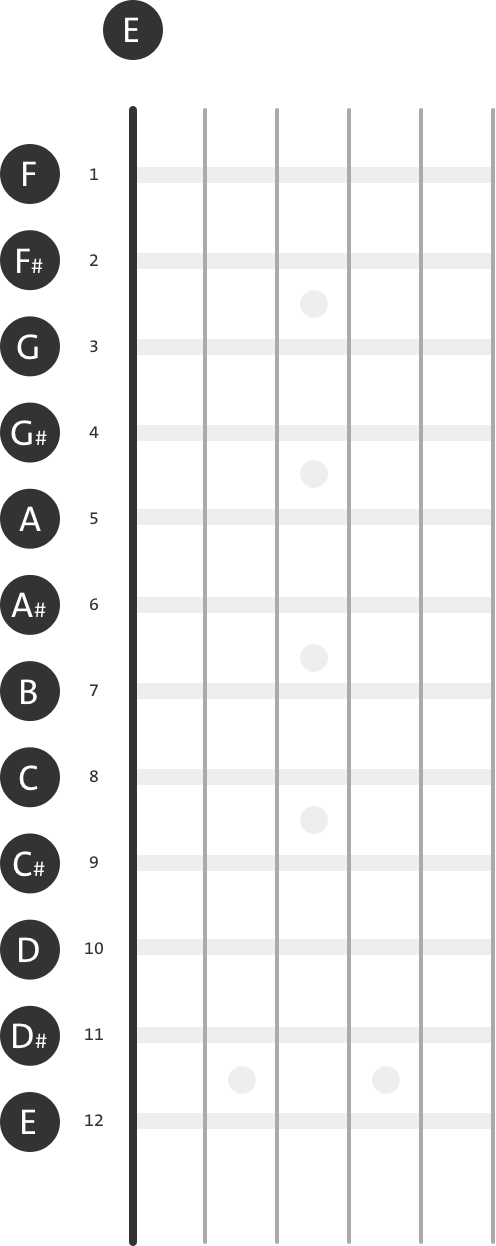
If you move the fingering of the chord up on the fretboard and position your index finger flat on the first fret, what chord are you playing? The answer is indeed an Fm. And what happens when you move this fingering up to the seventh fret? Wel… yup, that’s a Bm. To help you with the locations of the root notes on the lower E string we made a diagram. Check it out below.
Two down, one to go
So now you’ve learned two things: one, you can use the fingering of the E and the Em to unlock every major and minor chord using the lower E string; and two, placing your index finger flat on the fretboard shows you which root note you are turning into a chord. So far so good, right? But what happens when we move one position up across the strings?
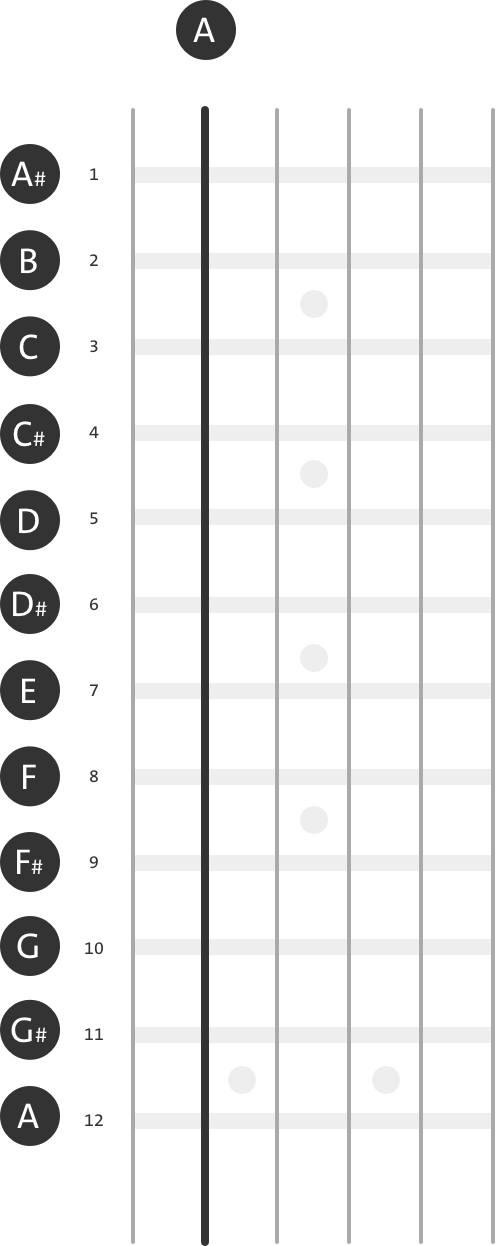
Apart from the fact that you now use the A string for locating your root notes, not much has changed. If you play an A chord and move it up a fret while pressing your index finger on all the strings from the A up on first fret, you’ll hear a A#. One fret further lies the B, then comes the C, and so on. Again we made you a map of the fretboard so you don’t get lost on the A string.
And now for the grand finale
Now you know your way around the lower E and A string. “But you didn’t explain how to play the minor chords on the A string!” That’s true. And we also said that three chords would do the trick. It seems we have been lying all along. What a bummer!
Just kidding! Prepare for the last bit of mind-blowing info. Let’s go back to the finger setting of the E chord. What if you move that exact same fingering up a string, what chord do you hear when you give it a ring? That’s right! It most definitely is an Am. Move it up two frets using the practical theory you just learned to turn your Am into a Bm. And what if you move the fingering of your Bm down again across the strings – to the lower E third fret? This is a G chord. Yeah, we think you got the hang of it. Keep practicing your grip and in no time you’ll rule the fretboard as you’ve never before. Happy jamming!
